DO NOT PLAGIARIZE!!!!!!!!
This assignment is a
way to become accustomed to writing about art, interpreting and analyzing
artwork produced by prominent photographers throughout history. Through this research you will become more
familiar with an artist’s style, process, and technique. Each of you will use this research as a
source while completing a photo assignment by emulating your photographer’s
unique style.
DO NOT PLAGIARIZE!!!!!!!!
You must sign up and
commit to a photographer with Mrs. Rotella.
You cannot have the same photographer as anyone else in your class. Please make sure these photos are school
appropriate.
DO NOT PLAGIARIZE!!!!!!!!
Here link to lists of famous photographers: Link and
Link
Here is the
LINK to select your photographer form to let me know what photographer
you will be using.
You will be creating is a blog post (Major) and a
poster (Minor) to share with your classmates.
You will have your blog post spelling and grammar checked and posted by 12/13/17 and your poster is due submitted via email AS AN ATTACHMENT to rachael.rotella@woodbridge.k12.nj.us
DO NOT PLAGIARIZE!!!!!!!!
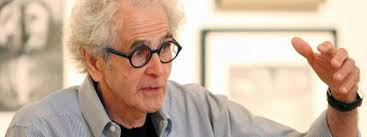 |
| Jerry Uelsmann |
Section 1: Brief
Biography
This section should include relevant information about
the photographer, including when and where the photographer lived and produced
art. The biography should contain
information relating to his or her artwork, as opposed to trivial facts. Life events that influenced, changed, or made
any sort of impact on the photographer’s artwork should be included in this
biography. Do not get overwhelmed with
the little details of the photographer’s life.
Instead focus on the bigger picture – what shaped his or her unique
style of taking and making photographs.
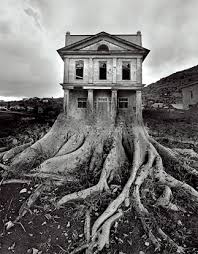 |
| Untitled, 1982 |
Section 2: Artwork
This section should discuss style, process, techniques,
common subject matter, and common themes of your photographer’s work. Make sure to note if there are any
significant shifts or changes in any of these elements throughout your artist’s
life. Discuss the different locations
of their photography, who or what influenced their artwork, and most
importantly discuss their UNIQUE STYLE.
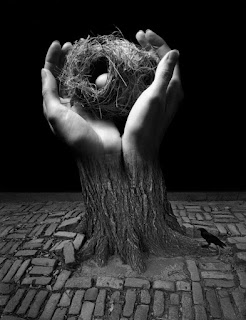 |
| Journey into Night, 2006 |
Section 3: Analysis
Select 5 specific photos completed by your photographer
that you will like to investigate and discuss further. Describe such things as composition, style,
subject matter, concept and your thoughts and feeling. Be specific.
These photographs will be the basis for your recreations. Make sure you save clear copies of the
selected photographs.
Section 4: Plan
Write a plan of what you will do in order to create a poster in the photographer's style. Be specific. Describe the images, fonts, wording, etc. YOUR POSTERS SHOULD HAVE A CLEAR
CONNECTIONS TO THE PHOTOGRAPHER’S WORK. Work in 300 resolution, RGB and have image size be AT LEAST 13x19 inches.
DO NOT PLAGIARIZE!!!!!!!!


.jpg)


